
Blog
WorkBee Control v3.3.0 is out! G-Code Viewer Included
The long-overdue update of WorkBee Control is now available. Thank you for your patience!
UPDATE TO WORKBEE CONTROL V3.3.0For more information, read on ….
WorkBee Control was originally released at the end of 2019, and since then it has been shipped on every WorkBee CNC Machine and has just worked. So why change it?
Well, as you may know, WorkBee Control is based on Duet Web Control, which is then linked to RepRapFirmware (RRF).
WorkBee Control was originally launched to work with RepRapFirmware 2.x. Version 3.x of RepRapFirmware was released in 2020, and the best machine control firmware got even better.
RepRapFirmware 3.x brings with it lots of changes, potentially boring to most users, but exciting to many tinkerers, engineers and developers. We just had to switch.
So here we are, WorkBee Control v3.3.0 is now available and built for RepRapFirmware 3.3.0.
Before we get into too much detail here is what’s new:
- Naming Scheme
- RepRapFirmware 3
- Better System Settings Configuration
- Independent Y-Axis Lead Screw steps/mm
- Touch Probe is now a Probe
- Spindle Control Panel
- G-Code Viewer
- Plugins
Naming Scheme
Going forward WorkBee Control will always match the RepRapFirmware version number it is built for.
The latest version of WorkBee Control is v3.3.0 built for RepRapFirmware v3.3.0
Versions of WorkBee Control within the same RepRapFirmware version number will be WorkBee Control v3.3.0-1.2 for example.
RepRapFirmware 3
RepRapFirmware 3 uses GPIO (General-Purpose Input/Output), this basically allows the controller to be configured as we please. For example, fans can be mapped to heater outputs, and heaters can be mapped to fan outputs. Or a Probe can be mapped to an endstop input 😉
Meta G-Code is now available in RRF3. Variables, Conditionals, Loops, and Functions can now be used within G-Code. This opens up a world of exciting possibilities. Examples are as follows:
- Using G-Code only, calculate the diameter of an endmill.
- Projects could be created which will adjust dynamically based on the WorkBee CNC Machine size.
- Check to see if a homed position has changed from a previous homed position.
These are only basic examples, but we are sure the community will come up with lots of creative uses.
RRF3 now has an object model. It is a tree structure that basically contains everything about the machine, configuration, firmware, state, and this is all accessible within G-Code.
DUET3D - RepRapFirmware 3 OverviewBetter System Settings Configuration
Previously all default WorkBee CNC Machine configuration commands were located inside config.g and users settings in customconfig.g.
This worked fine, but there is a better way.
Config.g is now split out into sub-files each configuring a specific area of the CNC Machine.
We now have:
- config.g
- config-axes-calibration.g
- config-axes-endstops.g
- config-axes-limits.g
- config-axes.g
- config-drives.g
- config-laser.g
- config-network.g
- config-probe.g
- config-spindle.g
- config-user-settings.g
The names are all self-explanatory. Config.g just runs all these sub-files and contains some miscellaneous commands.
All custom user settings should be placed in config-user-settings.g. This file is executed last, so it will overwrite anything previously set.
Having the configuration split into separate files allows settings to be easily configured from panels within WorkBee Control. The current configuration panels are Machine Size and Steps/mm, but we can easily add more.
The homing files have also had an update. Homing files used to be dependent on the CNC Machine size. Now they reference the object model. So, the Homing files are now the same across all WorkBee CNC Machine sizes.
When pausing the WorkBee it used to trigger the CNC Machine to home. Now we have the object model to reference, it just goes to machine maximum. The limit switches are not used. So even if a limit switch is broken, it will pause correctly.
Config.g also now includes a System Settings version number, this is now displayed in WorkBee Control under Machine Specific.
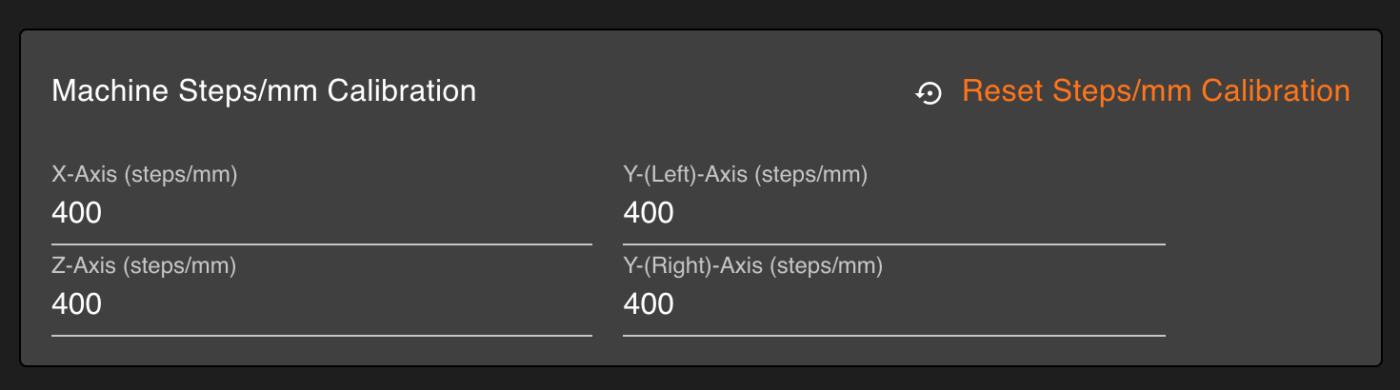
Independent Y-Axis Lead Screw Steps/mm
The WorkBee CNC Machine uses two Lead Screws on the Y-Axis. The biggest WorkBee CNC Machine has a travel of 1270mm. We have a system that can match Lead Screws within the desired accuracy for the biggest WorkBee quick enough for our production line.
But the Lead Screws are tensioned by the end-user, this stretches the Lead Screws by a small amount, thus changing the pitch. For the pitches to stay the same, the tension needs to be the same.
A long-requested feature has been independent Steps/mm for the Y-Axis. Initially, it does not seem possible, but RepRapFirmware allows custom driver movement matrices to be applied to kinematics. This is what we have done, and voila! – Independent Y-Axis steps/mm on your WorkBee CNC Machine.
Better still, these values can be changed from within the WorkBee Control interface.
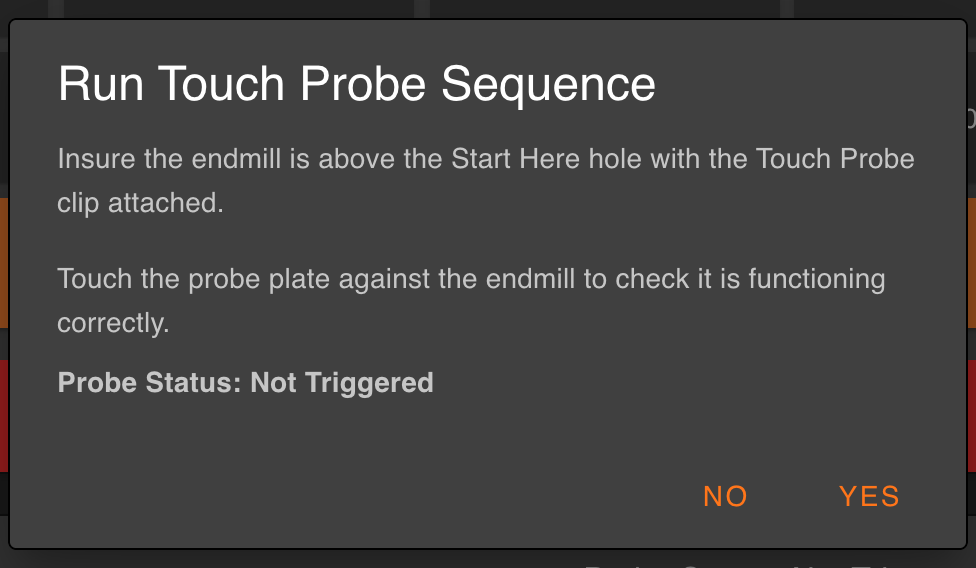
Touch Probe is now a Probe
In RRF 2.x the Touch Probe was set up in a quasi-state. It was used as a probe but it was not ‘technically’ a probe in the firmwares eyes.
With the new firmware, we can map a probe to a spare endstop input. Now the Touch Probe is an actual probe.
It still retains all the previous functionality, but it can now also easily be used for other advanced probing functions like height maps.
Most importantly now it is a probe, we can display its status. The confirm probe dialogue now displays the probe status, so you can check it is working before probing. No more broken endmills, hurrah!
Spindle Control Panel
With the WorkBee Z1+ we supply manual control Router Heads. But we know many users have software-controlled spindles for their WorkBee CNC Machine. There is now a handy Spindle Control Panel in WorkBee Control.
You can control multiple spindles, each with a unique name, from one panel. If you have more than one spindle on your WorkBee, please send us a picture!
All functions of the spindle can be controlled from this panel.
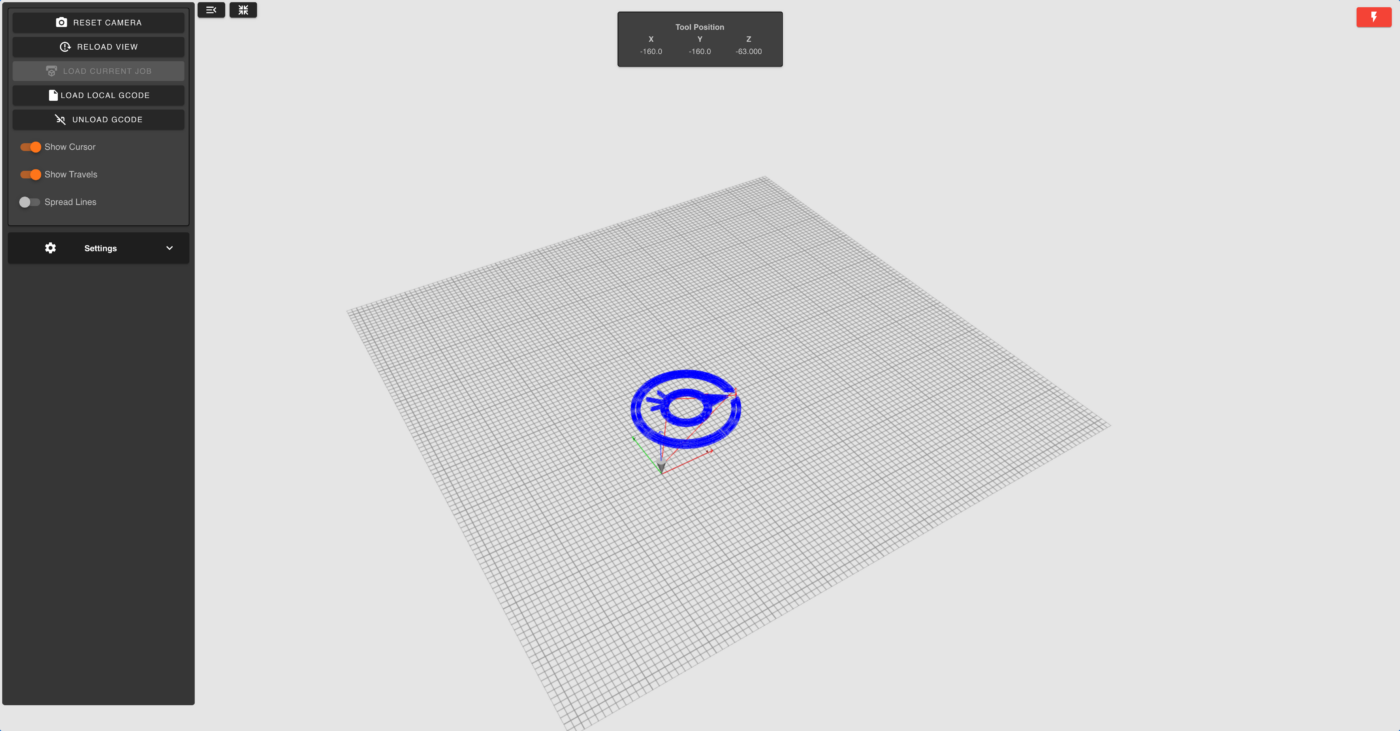
G-Code Viewer
Yes, WorkBee Control now has a G-Code viewer. Very useful so you can check the toolpaths one last time before pressing go.
It is based on the 3D Printing G-Code Viewer by Juan Rosario but modified to make it CNC Machine friendly.
In the G-Code Viewer, the mesh bed represents the Working Area of your WorkBee. The XYZ Axes are positioned within that mesh at your currently selected Work Zero position.
Loading a Local G-Code file into the viewer, it will use the Work Zero. You can now visually see if your job is too large for your machine, or if your Work Zero is set in the wrong position, as the toolpaths will fall outside the meshed area.
There are two ways to view a current job in the WorkBee Control G-Code Viewer.
- Press ‘Load Current Job’ this will load the currently running G-Code file, but only show progress thus far.
- With the Job running go to File Management > Jobs. Right-click the current Job and press ‘plugins.CNCgcodeViewer.view3D’. It will now display the whole job, with the current progress displayed in green.
Plugins
With the new WorkBee Control comes plugins. This allows WorkBee Control to be easily extended by 3rd Parties without affecting the core functionality of WorkBee Control.
There are multiple standard plugins within WorkBee Control under General > Built-In Plugins.
If you are interested in creating a plugin, for the technical details on how to begin, take a look here: https://github.com/Duet3D/DuetSoftwareFramework/wiki/Third-Party-Plugins
Thanks for reading and hope you enjoy the new WorkBee Control – Ryan